Expo Error Registering User There Was a Problem Understanding the Server Please Try Again
Editor's note :This React Native biometric authentication tutorial was final updated on xi February 2022; all outdated data has been updated and a new section on Using react-native-biometrics was added.
In this biometric authentication tutorial, we'll prove you how to authenticate users with face up ID and bear on ID in a bare-bones React Native and Expo app.
We'll use an Expo SDK, expo-local-authentication, to implement biometric hallmark in our app. This uses the Platform APIs to access the device hardware so there is no chance of leaking any private information from the device.
With this SDK, we'll implement local authentication with both facial recognition and fingerprint scanning in our React Native apps.
Throughout the course of this tutorial, nosotros'll cover:
- What is biometric authentication?
- Implementing biometric authentication in an Expo app
- Installing
expo-local-authentication - Checking for device compatibility
- Checking for biometric records
- Installing
- How biometric authentication works
-
promptMessage -
cancelLabel -
disableDeviceFallback -
fallbackLabel - Permissions
-
- How do you implement biometric authentication in React Native?
- Permissions in React Native
- Using
react-native-biometrics-
isSensorAvailable() -
simplePrompt()
-
Let's become started!
What is biometric authentication?
Biometric hallmark is a type of multifactor authentication (MFA) that employs data derived from the device user's biological traits, such as facial characteristics, voice recognition, and fingerprints, to protect personal information and sensitive assets.
Mobile apps of all kinds use local biometric authentication. The all-time thing about biometric authentication is that it is performed entirely within the user's device, so there is no risk of leaking sensitive data to a third-political party API.
Aside from verifying user identities, biometrics can also serve as an boosted layer of security aslope traditional sign-in methods, such as email/password.
Implementing biometric authentication in an Expo app
To outset our tutorial, allow's go over the steps for installing, importing, and setting up biometric hallmark in an Expo app. Nosotros'll kickoff with a expo-local-authentication case.
Installing expo-local-authentication
First, run the following command to install the expo-local-authentication library:
// with yarn yarn add expo-local-authentication // with npm npm install expo-local-authentication
Adjacent, import the package by adding the post-obit line to the JavaScript or TypeScript file where you want to implement biometric authentication:
import * as LocalAuthentication from 'expo-local-authentication'
Checking for device compatibility
Starting time, nosotros must check whether the device hardware supports biometrics. We'll use the hasHardwareAsync method provided past the Expo LocalAuthentication package we just imported when the folio is mounted:
// wherever the useState is located const [isBiometricSupported, setIsBiometricSupported] = React.useState(false); // Cheque if hardware supports biometrics useEffect(() => { (async () => { const compatible = expect LocalAuthentication.hasHardwareAsync(); setIsBiometricSupported(uniform); })(); }); // In our JSX we conditionally render a text to encounter inform users if their device supports <Text> {isBiometricSupported ? 'Your device is uniform with Biometrics' : 'Face or Fingerprint scanner is bachelor on this device'} </Text> The hasHardwareAsync method returns a promise that resolves to a boolean, hasHardwareAsync(): Promise<boolean>, indicating whether the user'south device supports biometrics.
For cases where there's no biometric support on the user'southward device, you should consider enabling alternative methods, such every bit passwords, to authenticate users.
Checking for biometric records
To bank check whether biometrics are saved on the user's device, we'll use the isEnrolledAsync method. This method returns a promise that resolves to a boolean, isEnrolledAsync(): Hope<boolean>:
const handleBiometricAuth = async () => { const savedBiometrics = await LocalAuthentication.isEnrolledAsync(); if (!savedBiometrics) render Warning.warning( 'Biometric record not institute', 'Please verify your identity with your password', 'OK', () => fallBackToDefaultAuth() ); } Notice how we set the app to fall dorsum to an culling method of authentication when there's no record of facial ID or fingerprint capabilities on the user's device.
How biometric authentication works
To actually cosign users via fingerprint browse or touch ID/face ID, we'll use the LocalAuthentication.authenticateAsync method. This returns a promise resolving to an object containing success, which can exist truthful or false.
Here's an instance of the payload returned when success is false:
Object { "error": "lockout", "bulletin": "Too many attempts. Try again after.", "success": simulated, }, The authenticateAsync accepts options of blazon LocalAuthenticationOptions as an argument. Here's what the options accept:
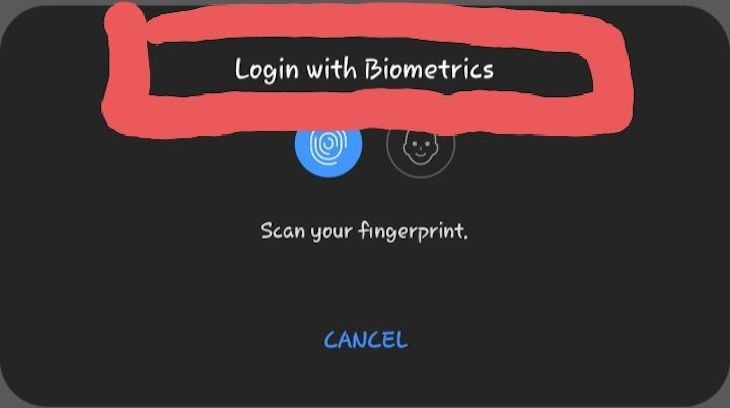
LocalAuthenticationOptions = { promptMessage?: string; cancelLabel?: cord; disableDeviceFallback?: boolean; fallbackLabel?: cord; } promptMessage
promptMessage is a message that's shown alongside the affect ID or face ID prompt:
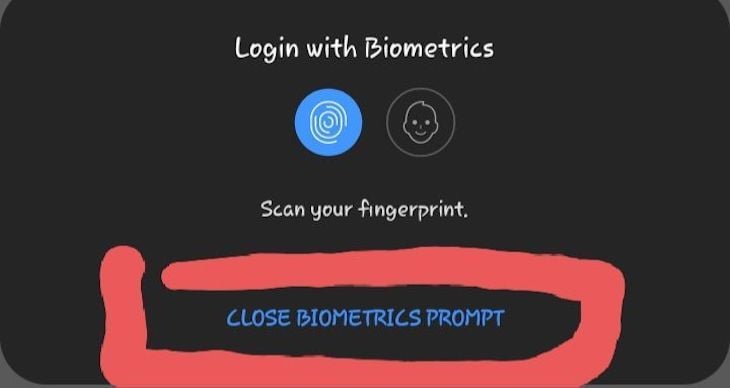
cancelLabel
cancelLabel allows yous to customize the default Abolish label that closes the biometrics prompt. Find how the default Abolish inverse to Close biometrics prompt.
For this to piece of work on some Android devices, you may demand to set the disableDeviceFallback to truthful.
disableDeviceFallback
disableDeviceFallback enables you to make up one's mind whether, subsequently multiple attempts at facial recognition or fingerprint ID, the app should fall dorsum to authenticate users with a device passcode. This pick is set to false by default.
You may need to set the disableDeviceFallback selection to truthful for your users to have access to the facial recognition biometrics API.
fallbackLabel
fallbackLabel allows you to customize the default passcode characterization. This option is only needed when disableDeviceFallback is imitation.
Here's an example of how to use the authenticateAsync method:
const handleBiometricAuth = async () => { const biometricAuth = await LocalAuthentication.authenticateAsync({ promptMessage: 'Login with Biometrics', disableDeviceFallback: true, }); } Permissions
On Android devices, permission are automatically added. On iOS, y'all'll need to add infoPlist.NSFaceIDUsageDescription to your app.json file in your Expo app.
You must place the NSFaceIDUsageDescription under ios.infoPlist.NSFaceIDUsageDescription in the app.json file. The value tin can exist something like the following:
APP_NAME needs to employ Face ID / Bear on ID to authenticate you
NSFaceIDUsageDescription is a message that tells the user why the app is requesting the ability to authenticate with face ID.
How practise you implement biometric authentication in React Native?
To use this bundle in a bare-bones React Native app, install react-native-unimodules, which enables you to use Expo modules in a React Native app.
Once you have successfully installed the React Native unimodule, you can implement local authentication the same fashion we did with Expo.
Permissions in React Native
For iOS, you'll need to add NSFaceIDUsageDescription to your info.plist file:
// info.plist <fundamental>NSFaceIDUsageDescription</key> <string>$(PRODUCT_NAME) Authentication with TouchId or FaceID</string>
This cardinal is required if your app uses APIs that access face ID.
For Android, you'll demand to add the following lines of lawmaking to your AndroidManifest.xml file:
<uses-permission android:name="android.permission.USE_BIOMETRIC" /> <uses-permission android:name="android.permission.USE_FINGERPRINT" />
Using react-native-biometrics
react-native-biometrics is a more secure way of treatment biometric hallmark because it uses both event- and consequence-based methods of biometric hallmark.
This means information technology doesn't merely depend on a boolean returned from a user'due south device to cease the hallmark flow like react-native-touch-id and expo-local-authentication.
Upon success, the biometric API retrieves a cryptographic cardinal and returns it to the React Native app; our app tin at present ship the key to the server for authentication, and upon successful verification of the key, grants the user permission to protected parts of the app.
To integrate this library into our React Native app, create a blank React Native app; if you have an existing React Native app, you tin can go ahead to skip this step:
npx react-native init NameOfYourApp
Then, run the post-obit command at the root of your app to start the server:
npx react-native kickoff
Next, run the following command to launch the app on Android emulator:
npx react-native run-android
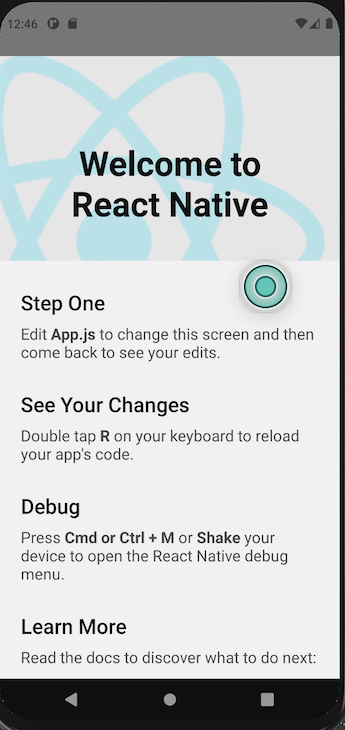
Yous should become the app running as seen on the screen beneath. If you come across an error, the React Native team has a guide on how to set your development environment.
Let's integrate this package into our app. To begin, run the post-obit command at the root level of the app to install information technology:
yarn add react-native-biometrics #or npm install react-native-biometrics
Now that we accept it installed, let'southward expect at a couple of methods available to us.
isSensorAvailable()
The isSensorAvailable() method detects if biometric back up is available in a user'south device. Information technology returns a Promise that resolves to the following objects:
interface IsSensorAvailableResult { bachelor: boolean; biometryType?: 'TouchID' | 'FaceID' | 'Biometrics'; error?: string; } Let'due south cheque if an Android device has biometric back up:
import ReactNativeBiometrics from 'react-native-biometrics'; <
Hither, we check if the device has biometric records and then cheque the type of biometric support that is available by calling the ReactNativeBiometrics.Biometrics method:
const isBiometricSupport = async () => { allow {available, biometryType} = await ReactNativeBiometrics.isSensorAvailable(); if (available && biometryType === ReactNativeBiometrics.Biometrics) { panel.log('Biometrics is supported', biometryType); } }; useEffect(() => { isBiometricSupport(); }, []); This method will return true if there are whatsoever biometric method records on the device, such as face ID or touch ID.
If you want to be specific about the biometric record available in the user's device, use the following snippet instead:
const isBiometricSupport = async () => { let {available, biometryType} = await ReactNativeBiometrics.isSensorAvailable(); if (available && biometryType === ReactNativeBiometrics.TouchID) { console.log('TouchID is supported', biometryType); } else if (available && biometryType === ReactNativeBiometrics.FaceID) { panel.log('FaceID is supported', biometryType); } else if (available && biometryType === ReactNativeBiometrics.Biometrics) { panel.log('Biometrics is supported', biometryType); } else { panel.log('Biometrics not supported', biometryType); } }; useEffect(() => { isBiometricSupport(); }, []); This checks if the device has TouchID and FaceID separately.
Please notation that ReactNativeBiometrics.TouchID and ReactNativeBiometrics.FaceID only piece of work on iOS. For android devices, use ReactNativeBiometrics.Biometrics.
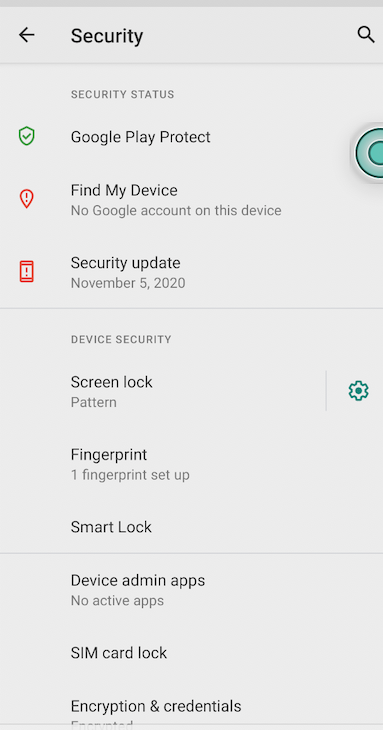
To exam this out, check the console to see what logs out. If you run on an Android emulator, yous need to enroll biometrics on the device.
To exercise this, go to Settings > Security > Fingerprint, then add a pattern or pin and run the following command on your terminal to enroll the fingerprint.
![]()
In one case y'all get to the fingerprint screen, run the following command multiple times to register a fingerprint:
adb -e emu finger touch <finger_id> Case: adb -e emu finger touch 5355aw3455
simplePrompt()
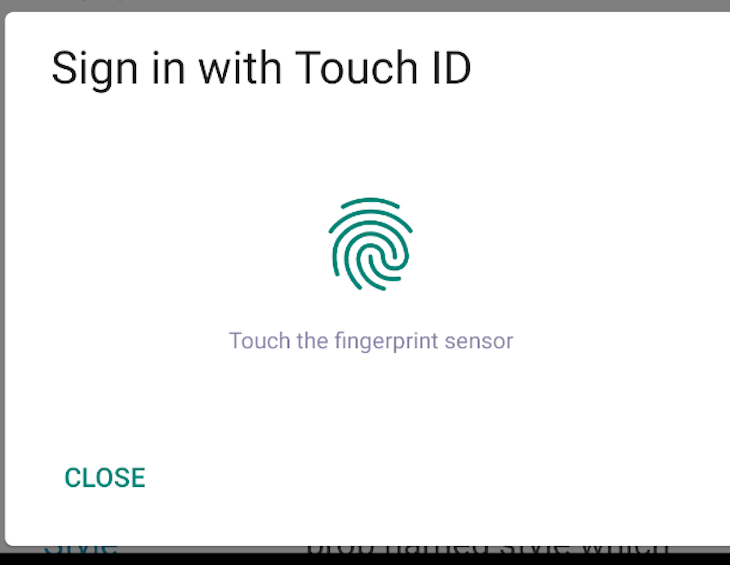
The simplePrompt() method accepts a promptMessage and cancelButtonText parameters that display the prompt bulletin and cancel text yous want to brandish to your users. It returns a Promise that resolves to success, a boolean and an option error, and a string if an fault occurs:
const isBiometricSupport = async () => { allow {success, fault} = await ReactNativeBiometrics.simplePrompt({ promptMessage: 'Sign in with Touch on ID', cancelButtonText: 'Close', }); panel.log({success, fault}); }; The previous code volition result in the following:
Conclusion
Local authentication has many utilize cases and I hope this tutorial makes it easier for you to implement biometric hallmark with fingerprint (touch ID) and facial recognition (face ID) in your Expo and React Native apps.
The total code used in this tutorial is bachelor on GitHub here and here
Feel gratis to drop a comment to let me know what you thought of this article. You tin can also notice me on Twitter and GitHub. Cheers for reading!
LogRocket: Instantly recreate issues in your React Native apps.

LogRocket is a React Native monitoring solution that helps you reproduce issues instantly, prioritize bugs, and empathize performance in your React Native apps.
LogRocket besides helps you increase conversion rates and product usage by showing you lot exactly how users are interacting with your app. LogRocket'southward product analytics features surface the reasons why users don't complete a particular flow or don't adopt a new feature.
Start proactively monitoring your React Native apps — try LogRocket for free.
neeleytwerfell1939.blogspot.com
Source: https://blog.logrocket.com/implementing-react-native-biometric-authentication-expo/
Enviar um comentário for "Expo Error Registering User There Was a Problem Understanding the Server Please Try Again"